

Spellbinders Serenity Garden Collection
- Kelsey Thomas

- Jun 29
- 3 min read
Hello!
I am back with some cards I made using the new Spellbinders Serenity Garden Collection.
Here is the first card:

I started by die cutting the flowers and leaves from colored cardstock using the Spellbinders Astrantia die set and my Sizzix Big Shot and magic mat. I then used Kat Scrappiness Kat's Crafty Dabbers and Peeled Paint and Spun Sugar Distress Inks to add some inking to the leaves and petals.
Next, I glued all of the flower layers together using Art Glitter Glue. I curled up the edges of the flowers so that they would have some dimension. I didn't glue the leaves to them at this point.
To create a background for my flowers, I used the Spellbinders Linear Touch Rectangles and Tag die set to cut a rectangle from black cardstock. I then glued the rectangle to an A2 card base that was made using Spellbinders Blush cardstock. I arranged the flowers on the panel and tucked the leaves underneath.
For a sentiment, I used the Spellbinders Summer Solstice Garden Sentiment BetterPress plates/dies along with my BetterPress LetterPress machine and Altenew Obsidian Pigment Ink. The sentiment reads "In summer, the song sings itself. - William Carlos Williams." I die cut it using the coordinating die and glued it to the card.
To finish the card, I accented the sentiment and flower centers with some gold pearls from my stash.
That's it for the first card.
Here is the second card:
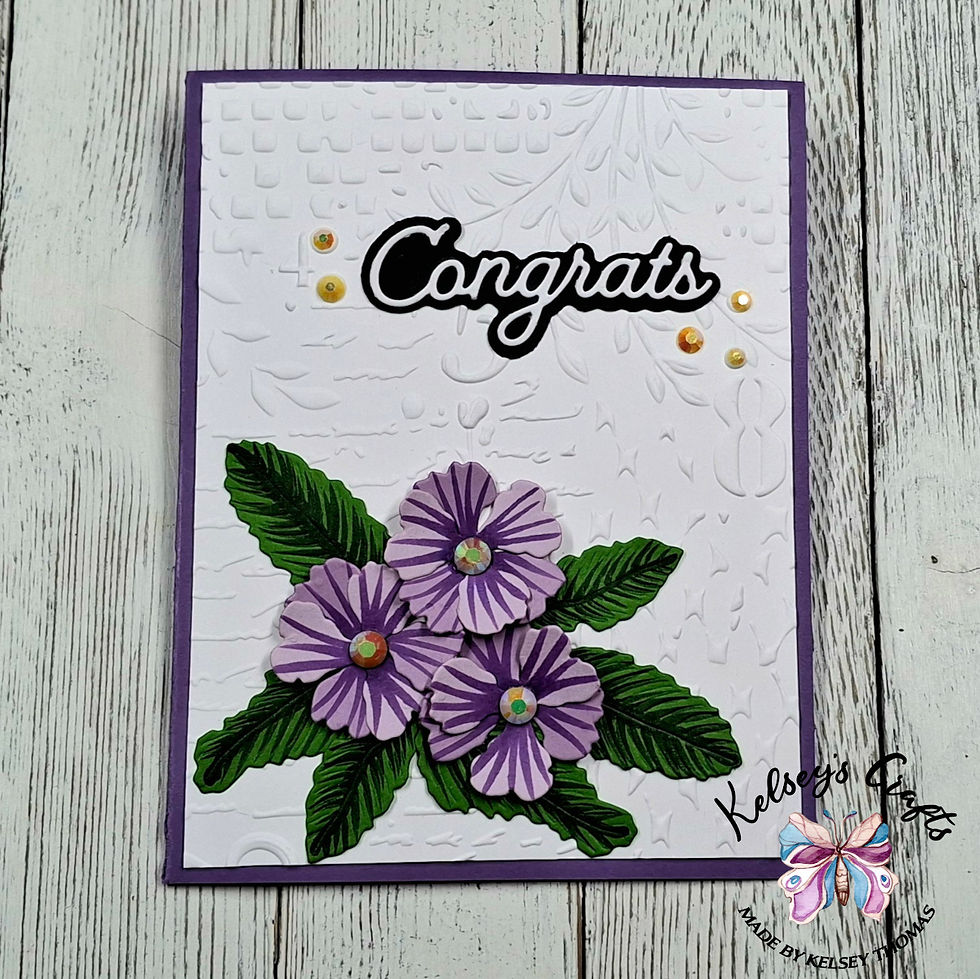
I cut the leaf and flower layers from colored cardstock using the Spellbinders Primrose die set and my Sizzix Big Shot and magic mat. I then used a V2.6 Royal Purple Olo marker to add some dimension to the petals and an Altenew G554 Evergreen Artist Marker to add detail to the leaves. I glued the petals together using Art Glitter Glue.
To create a background, I trimmed a piece of white cardstock to 4" x 5.25" and embossed it using the Spellbinders Distress Mix 3D embossing folder. I glued this piece to an A2 card base that was made with Spellbinders Lilac cardstock.
I then arranged the flowers on the panel and tucked the leaves underneath.
For the sentiment, I used the Spellbinders Layered Congrats die and cut the sentiment from white and the shadow from black cardstock. I glued the sentiment toward the upper right.
To finish the card, I added some gems from my stash to the flower centers and around the sentiment.
That's it for the second card.
Here is the last card:

I cut the flower and leave layers from colored cardstock using the Spellbinders Tassel Flower and Ladybugs die set and my Sizzix Big Shot and magic mat. I used a Kat Scrappiness Kat's Crafty Dabber and Peeled Paint Distress Ink to add some dimension to the leaves and stem.
To create a background for my card, I trimmed a piece of white cardstock to 4" x 5.25" and embossed it using the Spellbinders Dimpled 3D embossing folder. I also created a frame using the Spellbinders Linear Touch Rectangles and Tag die set and black cardstock.
I arranged my background panel and frame on a purple A2 card base that was made using Spellbinders Violet cardstock and glued them in place using Art Glitter Glue. I then arranged the flowers and glued them in place.
For a sentiment, I used the Spellbinders Summer Solstice Garden Sentiment BetterPress plates/dies and my BetterPress LetterPress sytem and Altenew Obsidian Pigment Ink. The sentiment reads "In the midst of winter, I found there was, within me, an invincible summer. - Albert Camus." I used the coordinating die to cut it out and then inked around the edges with the Peeled Paint ink. I then glued it to the card.
That's it for all three cards. I hope you enjoyed them and are inspired to create.
Happy crafting!
Kelsey
*Affiliate links are provided, when available, at no additional cost to you. Thank you for supporting these small businesses and my crafting. I appreciate it!
**Other products used:


Comments