

Spellbinders Classic Pooh Baby Cards
- Kelsey Thomas

- Jan 18
- 4 min read
Hello!
I am back again with some more baby cards using products from the new Spellbinders release.
Here is my first card:
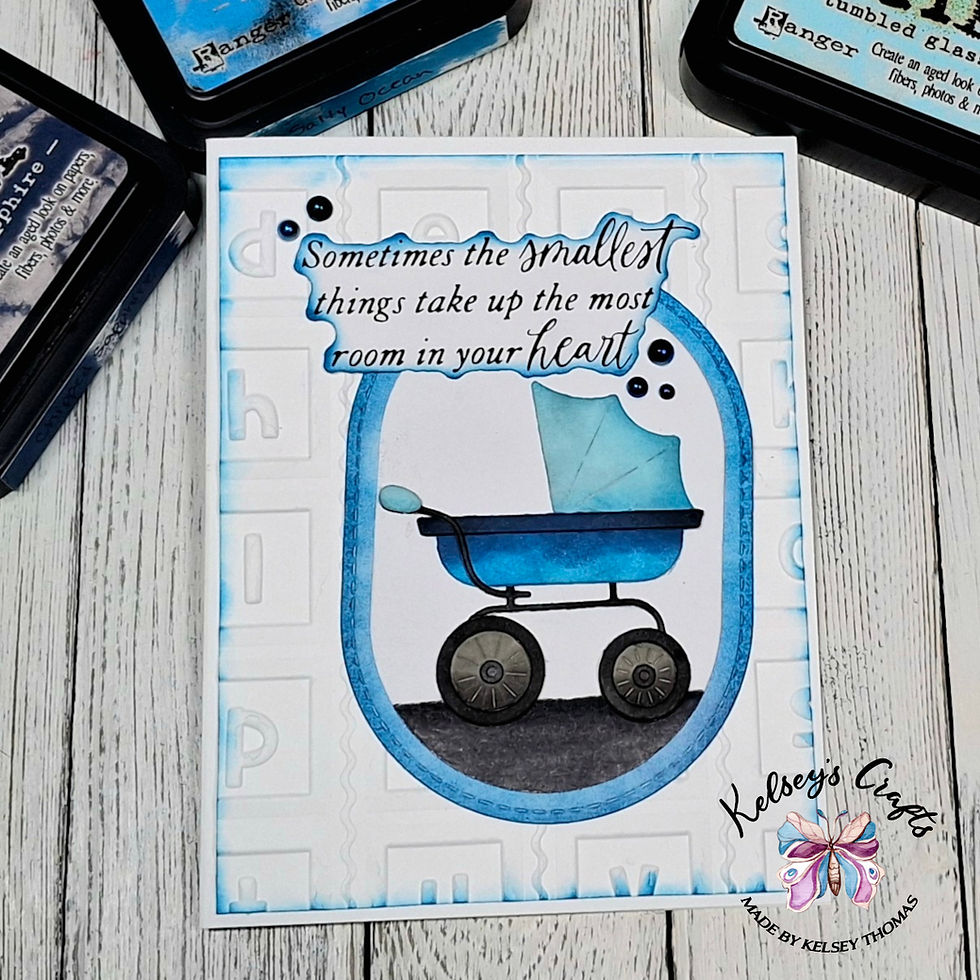
I started by die cutting the pieces for the baby stroller from the new Spellbinders Baby Accessories die set using my Sizzix Big Shot machine and magic mat. I cut all of the pieces from Neenah white cardstock and used Kat Scrappiness Crafty Dabbers and Distress Inks to add color. I used the following colors: Pumice Stone, Black Soot, Tumbled Glass, Salty Ocean, and Chipped Sapphire.
Next, I die cut two ovals from white cardstock using the Spellbinders Scallop and Stitched Edge Ovals dies. For the smaller one, I used Prismacolor pencils to create a ground for my stroller. I used Black, 90% Warm Grey, 70% Warm Grey, and 50% Warm Grey. For the larger oval, I inked around the edge with Salty Ocean Distress Ink.
For the background layer, I embossed a piece of 4" x 5.25" white cardstock using the new Spellbinders Classic Pooh Baby Blocks embossing folder. I inked around the edges with Salty Ocean to make it stand out.
To create my sentiment, I used the new Spellbinders Sweet Sentiments Press and Foil set along with its coordinating die. I used Altenew Obsidian Pigment Ink to ink up the plate and ran the whole BetterPress plaform through my Big Shot. I then used the coordinating die to cut out the sentiments and chose the one that reads "Sometimes the smallest things take up the most room in your heart."
I assembled all of my card layers onto a white A2 card base and glued them in place using Art Glitter Glue. I finished off the card by adding some Kat Scrappiness Midnight Sky Pearls.
That's it for the first card.
Here is card number two:

I die cut the pieces using the new Spellbinders Kanga and Roo die set from brown cardstock scraps using my Sizzix Big Shot and magic mat. I then used Kat Scrappiness Crafty Dabbers and Vintage Photo and Walnut Stain Distress Inks to add some shading. I glued the layers together with Art Glitter Glue and set it aside to work on the rest of the card.
I created the background by embossing a piece of white 4" x 5.25" cardstock using the Spellbinders Classic Pooh Baby Blocks embossing folder. I then used a blending brush and Spun Sugar Distress Ink to add some color.
I chose the sentiment "How do you spell love? You don't spell it, you feel it" from the Spellbinders Sweet Sentiments Press and Foil set.
I glued my card elements to a white A2 card base using Art Glitter Glue and then accented the card with some pink gems from my stash.
That's it for the second card.
Here is the final card:


For this card, I wanted to be able to show off the full image from the new Spellbinders The Hundred Acre Wood Press and Foil plate, so I came up with a fancy fold card that reveals the map inside. I started by inking up the plate using Altenew Obsidian Pigment Ink and running the BetterPress platform through my Sizzix Big Shot machine. I used Bee Inspired Watercolor paper. After the ink dried, I trimmed the panel to 4" x 5.25" in size. I then watercolored the image using Distress Watercolor Pencils (sets 1, 2, 3, 4, and 6) and a water brush. Specific colors are below:
Tumbled Glass
Mowed Lawn
Rustic Wilderness
Carved Pumpkin
Scattered Straw
Lost Shadow
Spun Sugar
Vintage Photo
Walnut Stain
I set the panel aside to dry and worked on the rest of the card.
To create the fancy fold card, I cut an 8.5" x 11" white piece of cardstock to 4.25" x 11" in size. I then scored it at 3.5" and 9" to create the flaps. I folded the flaps toward the center.
Next, I created the elements for the front of the card.
For the left flap, I cut a piece of white cardstock to 3.25" x 4" and embossed it using the Spellbinders Classic Pooh Baby Blocks embossing folder. I then inked it using a blending brush and Tumbled Glass Distress Ink. I glued it flat to the panel.
I die cut the pieces for Kanga and Roo using the Spellbinders Kanga and Roo die set from brown cardstock scraps and used a Kat Scrappiness Crafty Dabber and Vintage Photo and Walnut Stain Distress Ink to add some shading. I glued the pieces together with Art Glitter Glue.
To create a floor for Roo to stand on for the right side flap, I used the new Spellbinders Ribbon and Trim Borders dies and cut a scrap of white cardstock. I inked it up with Tumbled Glass Distress ink and glued it along the bottom of the flap. I trimmed the excess off with my scissors.
I glued Kanga to the left panel, making sure to only apply glue on the left side of her. I wanted her to hang over the edge to hold my card shut. I then glued Roo to the right panel.
For sentiments, I stamped "Lil' bundle of joy" from the new Spellbinders Bundle of Joy stamp set onto white cardstock using an acrylic block and Altenew Obsidian Pigment Ink and fussy cut around it. I glued this sentiment to the left panel. On the right flap, I stamped "Sometimes the smallest things take up the most room in your heart."
To complete the card, I glued the map panel to the inside of the card and die cut a white Kanga to glue to the back of Kanga to give a more finished look.
That's it! I hope you enjoyed these cards and are inspired to create.
Happy crafting!
Kelsey
*Affiliate links are provided, when available, at no additional cost to you. Thank you for supporting these small businesses and my crafting. I appreciate it!
**Other products used:


Comments